Cuphead’s notorious difficulty makes it a Max Fleischer-flavored hellscape. The bosses are fierce and furious, and without some guidance, they can be a truly bitter tea to swallow. That’s where this guide comes in. Fresh off of the bridge from Inkwell Isle II, you’ll notice that a fresh – and colorful – hell awaits you. With more baddies and some of the toughest challenges you’ve seen yet, get ready to get a heaping helping of hurt put on you.
Don’t worry, though. This guide is here to help you through the worst of it.
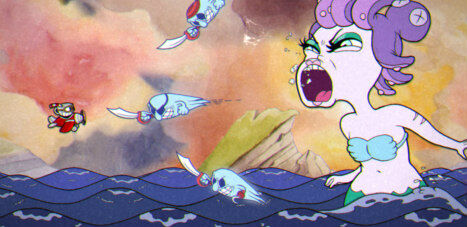
Cala Maria
Equal parts Ariel and Medusa, Cala Maria is as lethal as she is lovely. This giant mermaid is among the last of your airplane battles, but it’s also among the most dangerous on the island. Take your time, and get ready for a fishy fight.
First Phase
Maria has a pretty large catalog of attacks in the early going of this encounter. When she dives into the ocean, she’ll come back with one of two fish. The Red Fish will fire a shotgun-like spread from its mouth. The Yellow Fish fires a crazy lightning porpoise that follows you around. Both fish will slip out of her hands and jump toward you before returning to the water, so don’t get too comfortable.
Maria will also spit pirates from her mouth, who will throw themselves at you. She can summon sea horses from the water that spray jets and push you toward the top of the screen (aka ghost pirate range). Her sea turtle lobs bombs at you from below. Finally, a pufferfish mob will march in your direction to passively pound you. Maria and her friends will come at you from all angles, so get comfortable with that small plane mode.
Second Phase
Electric eels pop out of the water and bite Maria, filling her with volts and transforming her into a medusa-like creature. Her octopus hair is now a mop of snakes, and those catalyzing eels stick around to shoot bullets at you and generally cause annoyance. They can be shot, though, and clearing some of them out may be a good idea. However, shooting anything can be a challenge thanks to one major complication – Maria can turn you to stone. Her gaze is wide and near impossible to escape, so if (read: when) you’re caught, shake your movement stick wildly to break out. Eventually, you’ll shoot the poor girl’s head clean from her shoulders.
Third Phase
You’ll be tasked with giving Cala Maria’s head chase in coral cave, where objects from the ceiling and floor giving you static obstacles to weave around. Maria will also spit bubbles with skulls in them to zone you out. Maybe the most obnoxious part of this phase is that she can still turn you to stone, and it can be completely unavoidable. This is a frustrating sequence, but the difficulty makes sinking this shrieking siren all the sweeter.
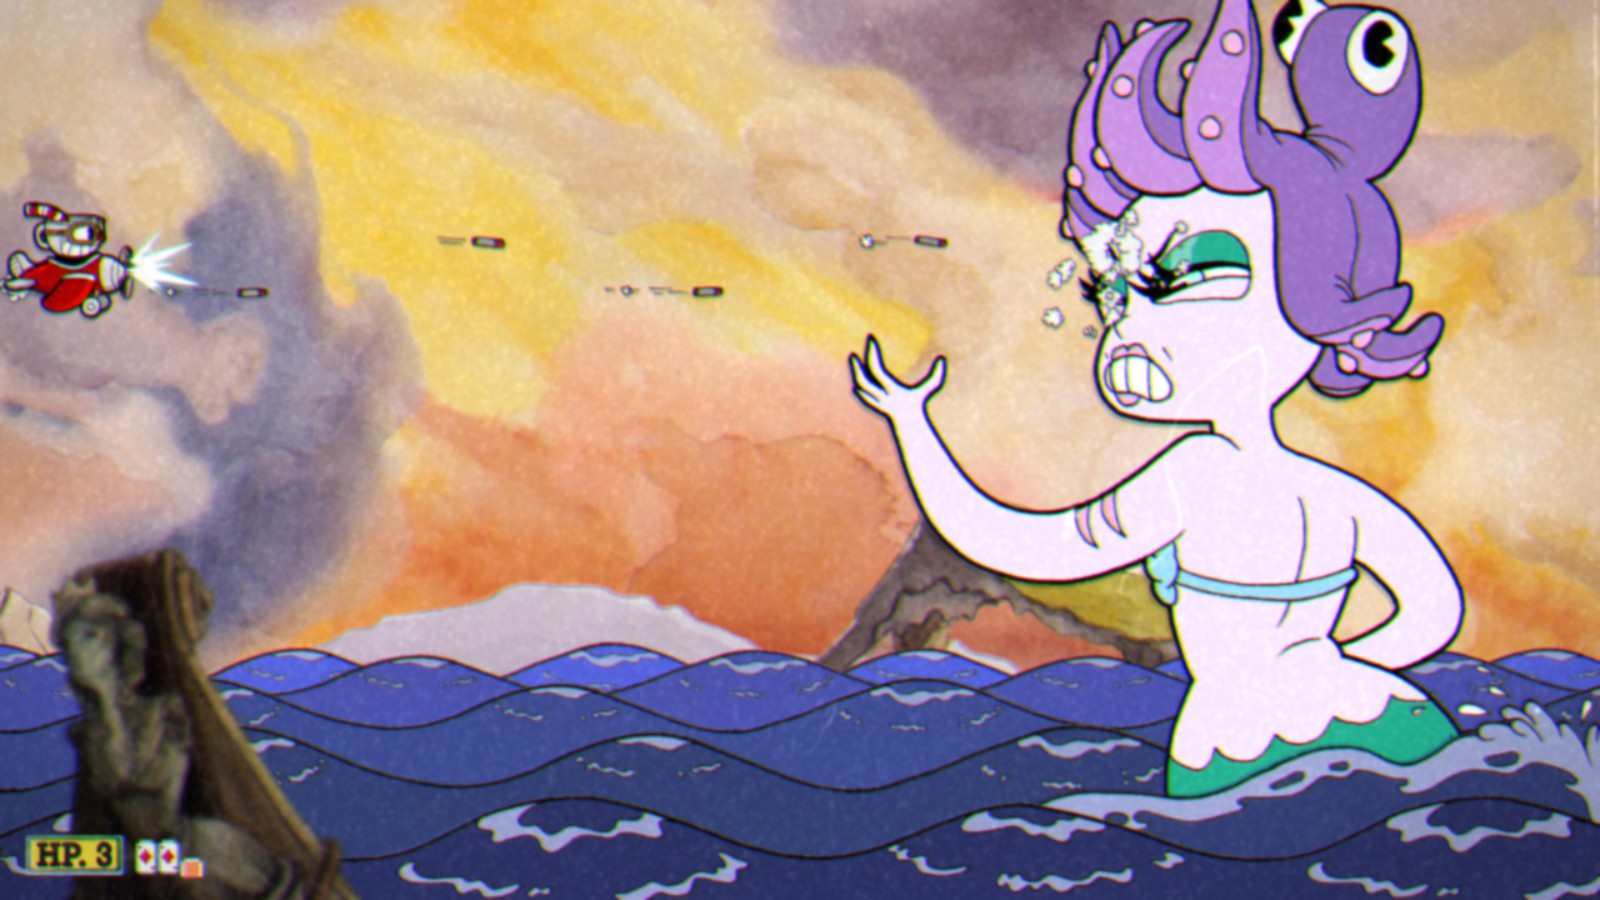
Captain Brineybeard
This buccaneer is big and he has an even bigger bag of tricks – but he’s also largely immobile and pretty easy to hit. Avoiding Brineybeard’s continuous barrage will be the big problem here. Charge shot and Spread work well here.
First Phase
This fight is very busy. A goofy grinning barrel being suspended over the area will be around for the duration of the battle. It moves back and forth, and when you travel under it, it will drop down on you. It doesn’t move quickly, but it’s always a threat.
Brineybeard will draw an octopus that he squeezes ink out of, firing it at you like a gun. The majority of those bullets can be parried, so keep that in mind when looking to build super meter and avoid a grim, ink-stained demise.
At Brineybeard’s command, a giant squid can appear, squirting the screen with ink. This makes your vision cloudy, rendering you completely vulnerable to all of Briney’s other attacks. Shooting him will get the tentacled tormentor out of your hair.
Another one of Brineybeard’s minions is a giant shark. When that big fin appears on the dock, get close to the boat. This is the only place you’ll definitely be safe from its big chomp. Generally, this is the best opportunity to attack the Captain during this phase.
The last big hazard is the Captain’s squad of sea dogs, ferocious bulldog-faced seals that march across the bottom of the screen. They are easy to kill, but on top of the rest of the issues filling the screen, they can sneak a hit in.
Second Phase
The biggest change from phase to phase here is that Brineybeard’s ship will actively attack you. The big face will spit cannonballs that roll down the dock toward you. Leap over them – you know, while avoiding everything else. The important thing about this phase is that the cannonballs make it hard for you to stand near Brineybeard and fire.
Third Phase
The boat goes AWOL, roars a mighty roar, and jettisons the Captain into the sea. A bigger, scarier boat brings two main attacks, the first being a big fireball. It dances up and down the screen, so jump over or duck underneath it accordingly. Also, the second is a big mouth beam that must be ducked under. It’s easy to know when he will shoot these things, so keep your eyes peeled. His weak point is in his mouth, a dangly uvula that needs your undivided attention. Stick with it, and the ship will sink promptly.
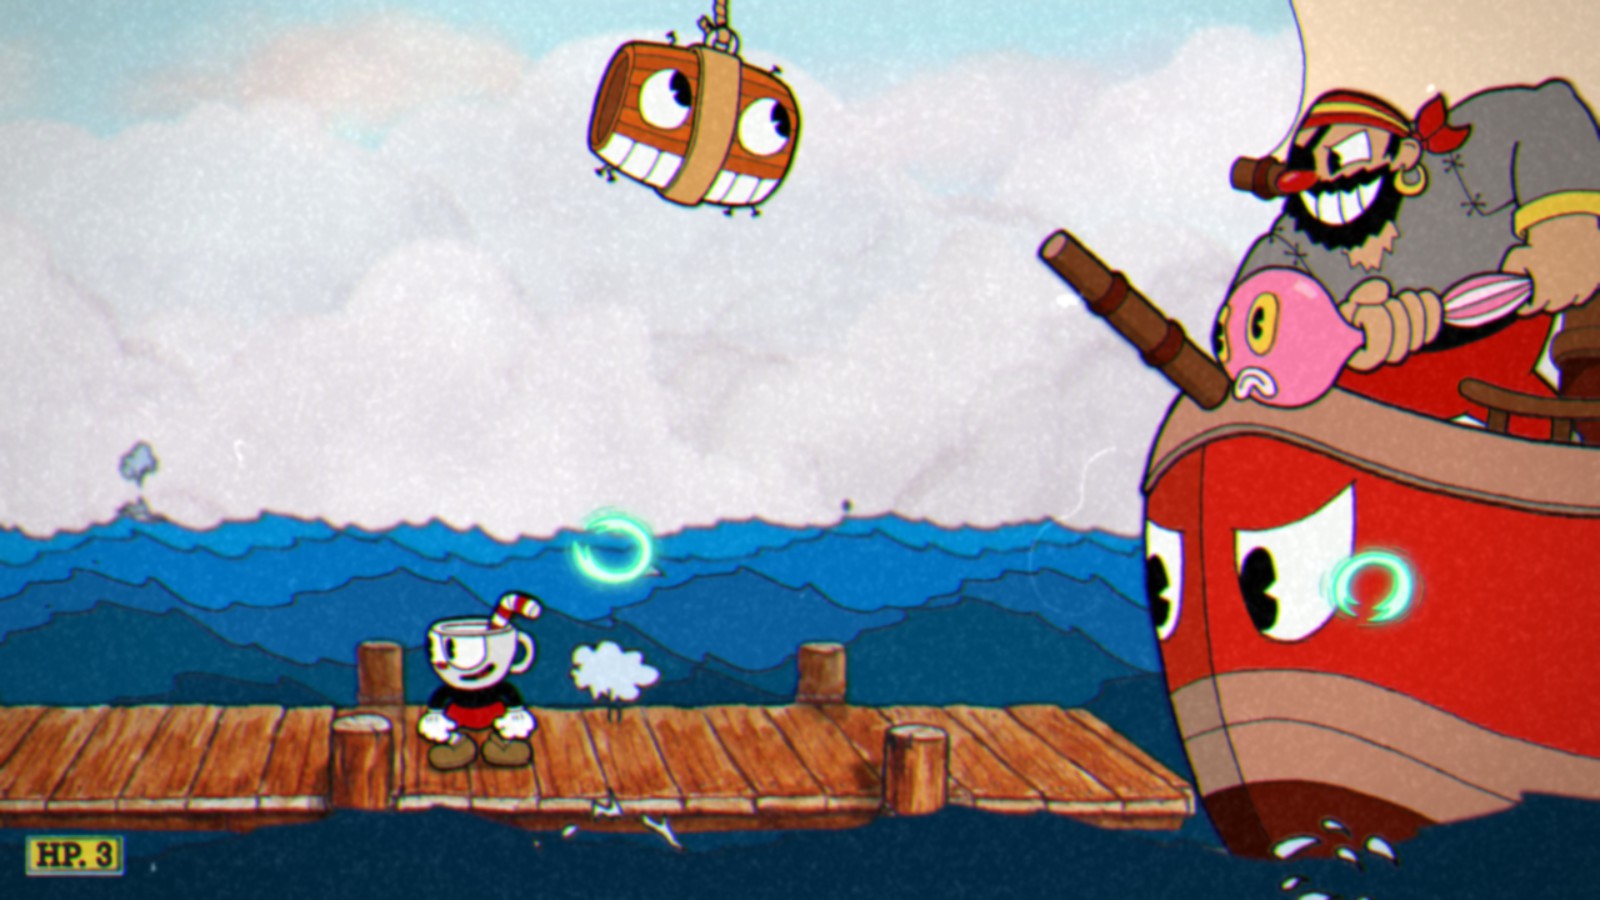
Werner Werman
This militarized rodent is geared up and ready to roll out all over your porcelain face. Compared to other fights on the island, Werner is actually pretty easy, but that doesn’t mean he can’t catch you slipping! Charge and Chaser shots are good here, as you’ll spend a lot of time moving around, but he rarely does much moving himself, so he’s a pretty easy target to acquire.
First Phase
From the safety of his soup can armored vehicle, Werner will alternate between a pair of attacks. From the top of his can, he’ll catapult garbage at you. There will be some pink items among the spread of trash, so parrying is an option. Otherwise, stay on your toes while dashing.
Werner will also toss a series of cherry bombs at you. When these bombs explode, they release little bolts of fire that run horizontally across the ground. Dodging them is a twofold task – avoiding them while airborne, and hopping over their byproduct.
You’ll notice that Werner himself is rocking back and forth. He usually won’t pass the middle of the screen, but when he launches a pair of pink springboards, he’s about to charge! To avoid his advance, you’ll have to parry on top of the springs to get the boost necessary to get up and over him. He will then continue his barrage from the other half of the screen. If your onslaught is constant, he should have time to do this once before entering his next stage.
Second Phase
Werner moves into the center of the screen, and a slat of the shack you’re in falls down to create a midscreen platform. Two flamethrowers poke out from either side of Werner’s contraption. He’ll alternate between moving to the top half and the bottom half of the screen to shoot these fiery weapons, so be sure to be where he isn’t (under him when he’s high, and on the new platform when he’s low.)
Spinning bottle caps will jab in from either side periodically, making it difficult to stay still for very long. They poke out one or two at a time from different elevations, but occasionally an entire side worth of bottle caps will emerge. When all of one side’s bottlecaps start spinning, move to the other side as quickly as possible.
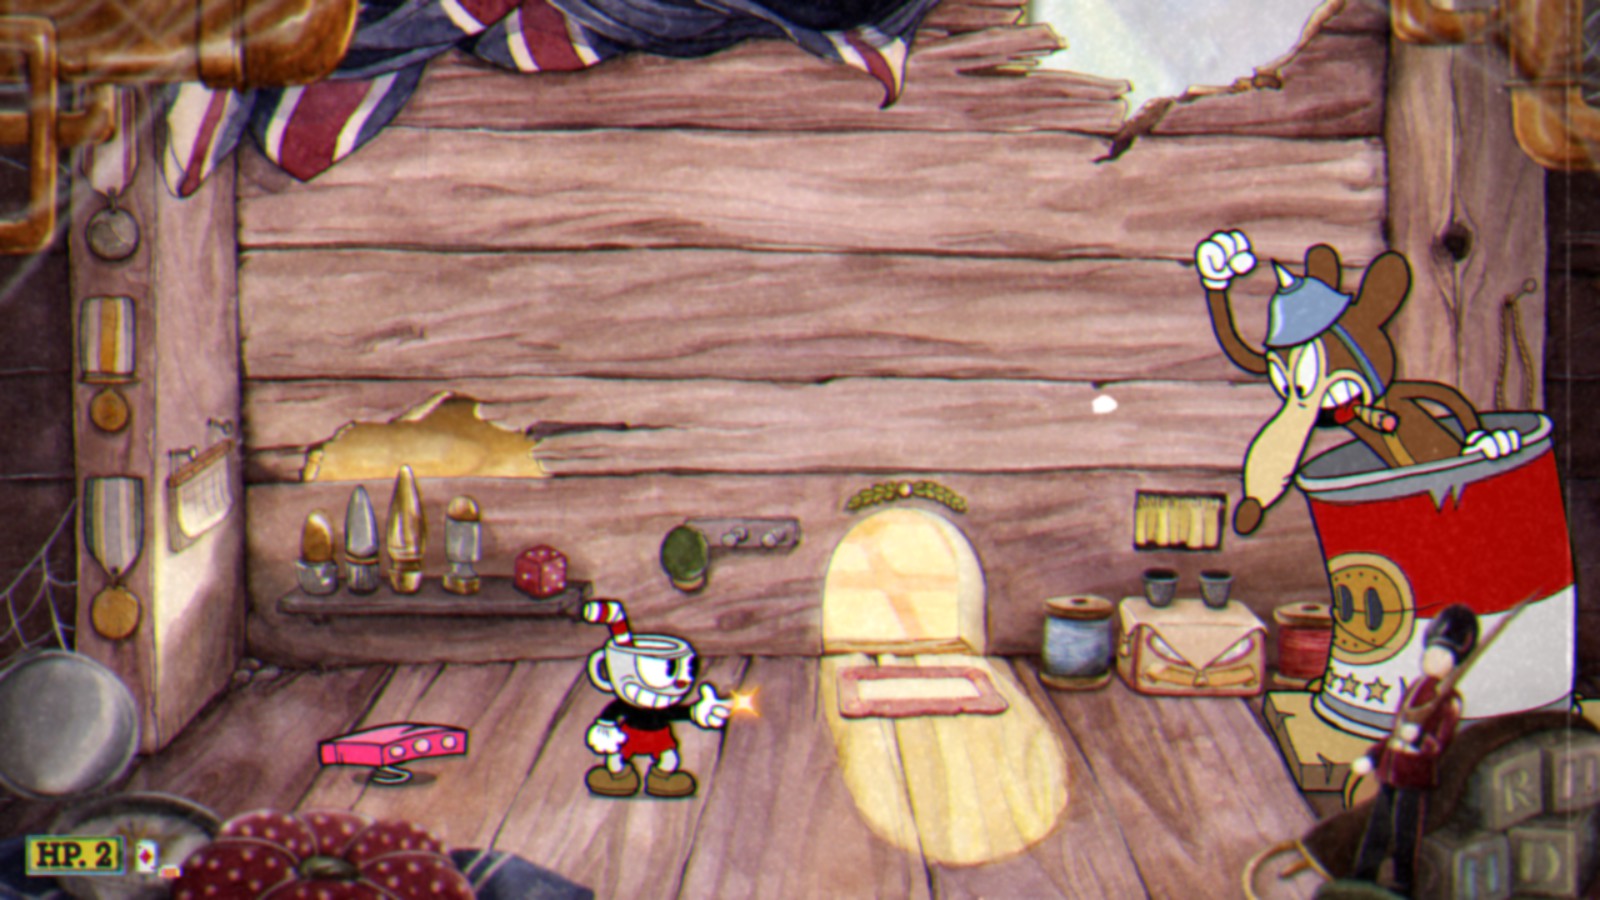
Third Phase
Notice the giant cat periodically peeking in on the proceedings through broken pieces of the background? When Werner’s vehicle finally breaks down, the cat will pounce. After breaking through the wall and eating poor Werner, he becomes your problem.
The cat’s big attack is his paw swipes. He reaches off screen, and his long arms chase you across the ground, covering a great distance. On top of that, the smashes of his paw shake shingles from the ceiling to fall down on you.
If that wasn’t enough, he will also spit ghost mice from his mouth, that linger and fire projectiles at you. The mice are killable, and their projectiles are parryable. Eventually he’ll replace the mice, and the total package creates for a very busy screen. The cat’s head is a very big target, though, so it’s not hard to hit consistently while also running for your life.
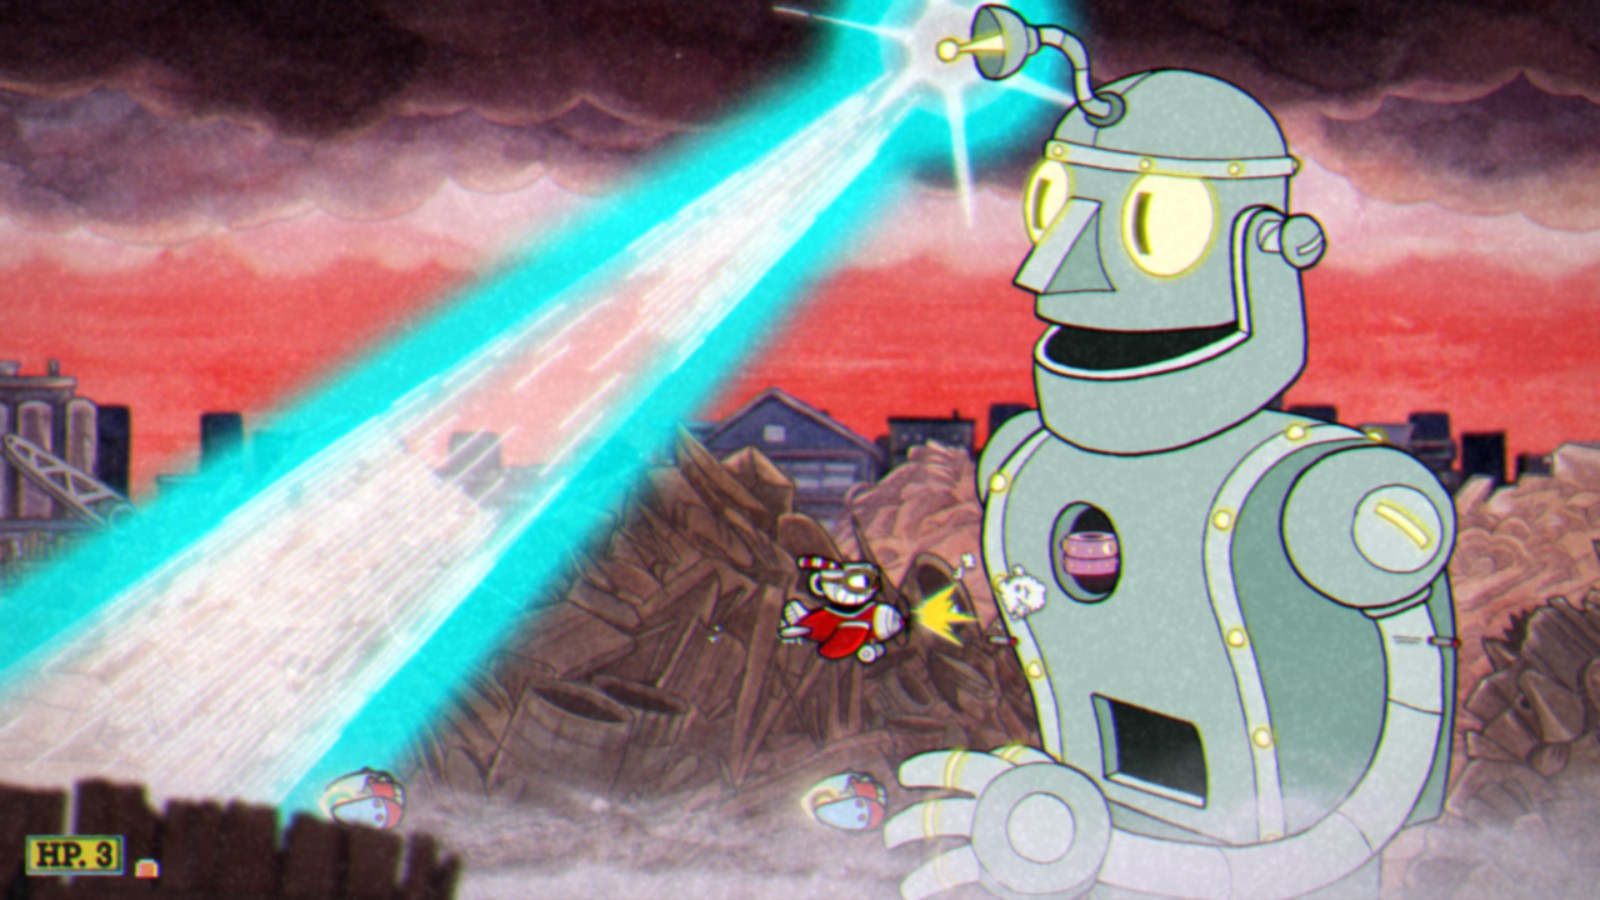
Dr. Khal’s Robot
Dr. Khal is one of the most annoying fights in the game. His first stage has a lot of moving parts and concepts to manage, and his last stage is a grueling test of endurance. This plane battle will really test all of your skills in aerial assault.
First Phase
The bad doctor’s giant machine has three targets to shoot. He has a laser beam that fires from a satellite dish on his head. The beam from the dish starts narrow and fans out, covering a pretty significant area. You have to dodge this – there’s no way to shoot through it. Target the dish and once it explodes, the robot’s head will begin launching nuts and bolts from its mouth. You’ll have to dodge these for the duration of the phase.
On the robot’s chest is a launcher that fires a beam gate every few seconds. The device is the cylinder in the center, that fires impenetrable lasers above and below it. You can’t pass through it, and it’s slowly moving towards you so you have to do something, or take damage. You can’t shoot the cylinder, but you CAN parry it. When you blow up the chest piece, the robot’s arm will begin to attack from behind, firing bullets or magnetizing you.
A squad of ships will emerge from the stomach slot, zig-zagging their way up screen, Galaga-style. They can be surprisingly quick, so ignoring them will be difficult, considering the rest of the chaos around you. However, they are easily taken out, the same way most things that travel in a line are in Cuphead. When you blow this piece off, homing bombs will launch, flying slowly and steadily towards you until they explode. They can be shot and can run into each other, but be warned, the explosion is deceptively large.
There may not be a “best order” to break pieces off in, but I found that taking out the beam gate launcher first gave me the most space to dodge for the most amount of time.
Second Phase
The robot’s head flies off of it’s shoulders, and begins to fly back and forth as you try to shoot it. On top of that, more homing bombs are slowly making their way to you. That being said, this is a pretty straightforward phase. Try to meet him with gunfire when he comes off screen from the right, and stay out of dodge when he emerges from the left.
Third Phase
Dr. Khal emerges from the top of the robo head, and extends an arm from the robo’s mouth. In his hand is a gem, that fires a long stream of bright colored projectiles, opening the gates to Bullet Hell. He will take a breather every so often to pull out a different colored gem, but the colors don’t do anything different. When dodging the bullets, you also need to dodge electric walls that are moving in on you from the top and the bottom. This is a very long phase, and can be pretty tough, but this low-rent Robotnik can be slain with practice.
Sally Stageplay
The story of Sally’s life seems relatively normal, if it wasn’t so perfectly designed to kill you. Sally is a challenging fight – until you get familiar with her patterns, in which case she becomes a fairly straightforward show. Bring Spread and Charge, and you’ll be ready for anything.
First Phase
Sally takes her wedding dress off and slips into something a little more pastel. She has several attacks at her disposal here, a couple of them giving her advanced mobility. Her umbrella will close around her and she’ll disappear, teleporting above and dropping down on you, if you’re not careful. She also has a diagonal dive kick, which is relatively easy to dodge. When she leaps into the air, slip under her and she’ll definitely miss you.
Sometimes when she jumps into the air, she will actually throw a fan straight under her, planting it in the ground. It will be a persistent obstacle for a while, so don’t step on them while dodging. She will also blow you a kiss, which travels in a similar zig zag pattern across the screen as you’ve seen in past boss fights. They are parryable, so keep that in mind when looking to gain meter.
Second Phase
When Sally jumps into the car in the background, she will exit the scene and the curtains will fall. When they rise again, you’ll now be in front of a house with many windows. Her dive kick and fan toss will remain as attacks, but she will gain a pair of new offensive techniques as well.
A baby will pop out of the rear windows periodically and drop bottles from the windows. They fall in a straight line and are relatively easy to avoid. The baby can be shot, but it’s best to just focus on Sally herself. She also drops wind-up mice out of her parasol. They crawl across the ground and up the walls, dropping back down on you from the ceiling. Be ready to dodge them twice.
Third Phase
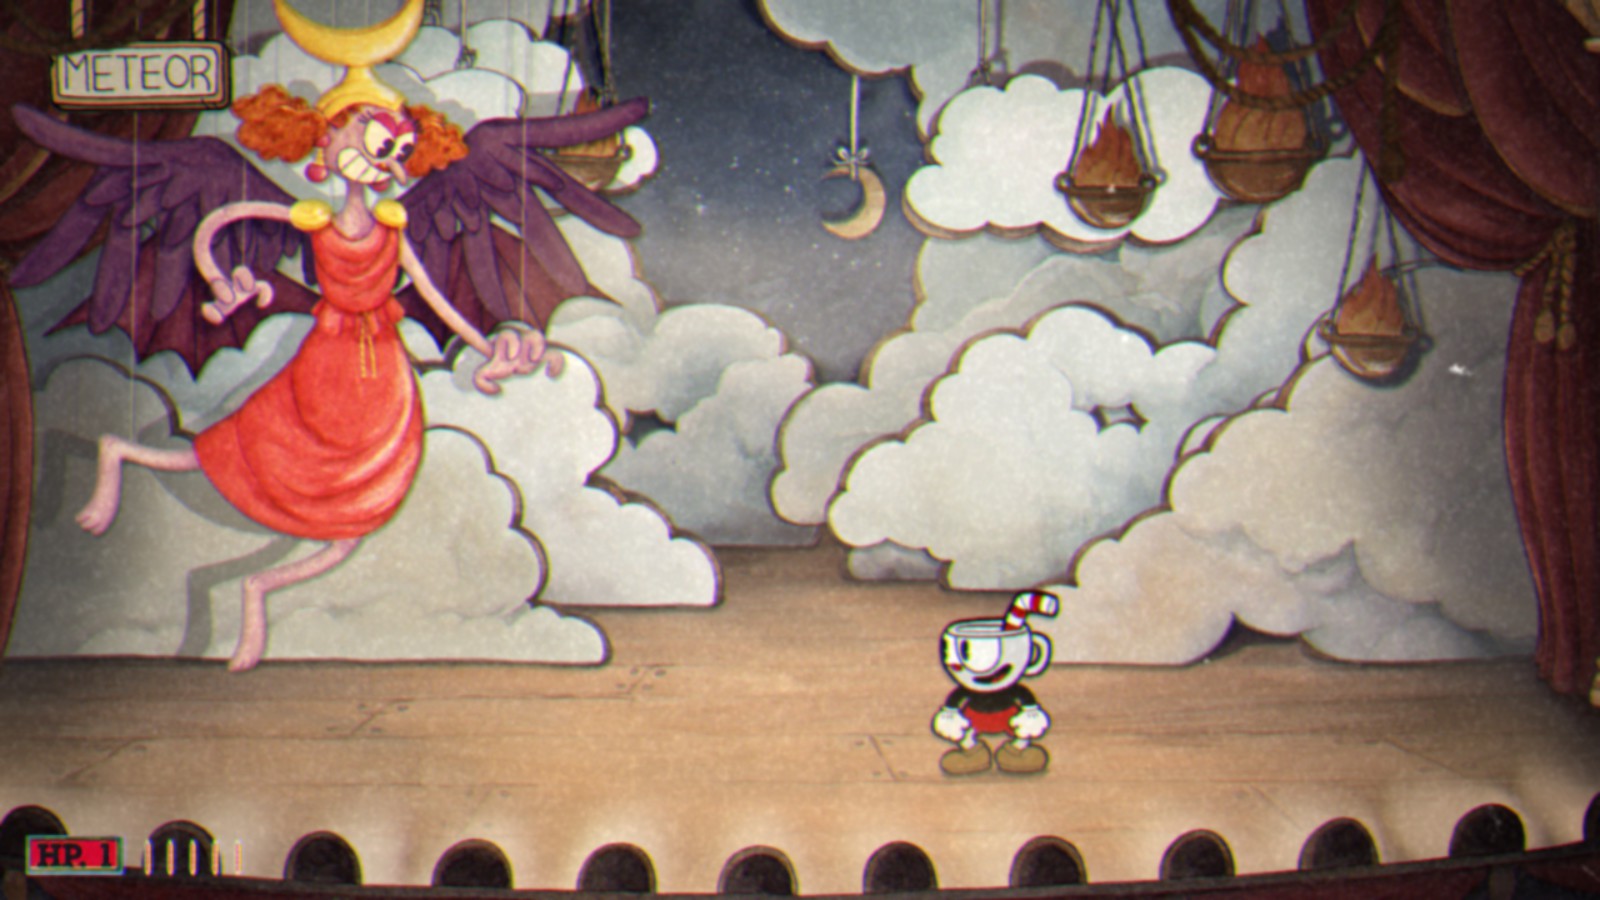
The curtain drops once more, revealing a sight that should be very familiar to RPG fans. Channeling her best Kefka, Sally floats in the corner, casting spells on you from her perch. She has a few attacks, but she telegraphs them well, as the name of the attack will appear in the upper left corner.
A cardboard meteor will be summoned, hurtling towards you. It can be shot, which will break it open to reveal a star inside, which will be parryable. Her big wave is just that, a giant wave that sweeps across the stage. Jump and dash to avoid it. Her last ability is lightning, which sends bolts down from the sky in random trajectories.
Fourth Phase
The last phase sees an angelic Sally floating over the stage for her big curtain call. Her parasol is now spinning recklessly below her, chasing you back and forth. Jumping and dashing over it is the way to go, but be warned that as soon as you hit the ground, it will be in hot pursuit once again.
There will also be roses being thrown from the crowd, so dodging them is imperative too. It won’t take too many more shots to put Sally back in the green room.
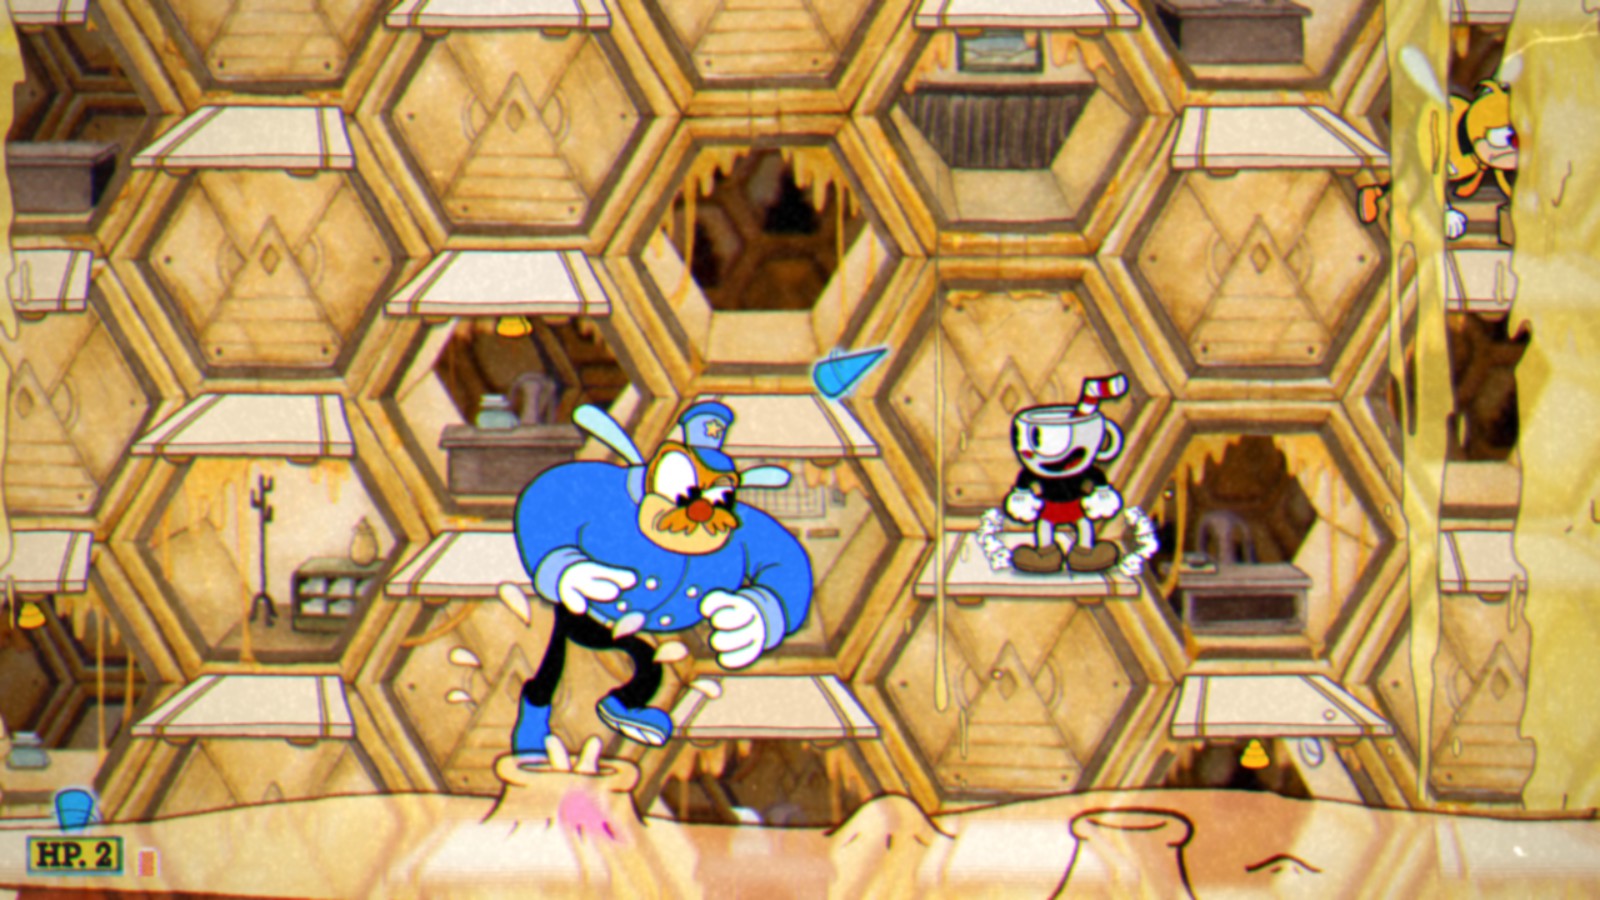
Rumor Honeybottoms
First Phase
Like the dragon Grim Matchstick, Rumor’s fight takes place in motion. During this phase, a big security guard bee will be your main adversary. He’ll toss a little ball at you, that will explode into several stingers. As the security bee passes back and forth at the bottom of the screen, despondent worker bees fly around everywhere else. They can be shot, but it may be best just to avoid them.
You’ll notice on the bottom there is a bubbling pool of honey following you to the top, with honey falls on either side of the screen. DO NOT TOUCH THESE!
Second Phase
Rumor will finally show up in person, bringing a variety of attacks in tow. She’ll pop out from the top of the screen, and her head will detach from her body like a wrecking ball. While it dangles on the bottom of the screen, she spits little bee bullets that zig-zag their way to the top. You have to dodge these, as they are invulnerable.
She can also appear on either side of the screen wielding a honey wand. With a flick of the wrist, she will either launch a slow moving ball of energy, or a triangle. The ball is parryable. The triangle will actually shoot other triangles out of its points, so stay on your toes there.
Third Phase
After going a little berserk, she will transform into an airplane (yes, an airplane). She flies to the bottom of the screen and begins to chase you upwards.
Rumor fires fists at you from the bottom of the screen. They aren’t necessarily tough to dodge, but in combination with the moving platforms, it can be difficult to make the right moves. Also difficult: shooting downwards to actually hit the queen bee. Stay motivated, and you can knock the crown right off of her head.
Phantom Express
First Phase
Once the train gets going, it’s important to get the lay of the land. You and the locomotive are moving, and you’re on a special cart that can change its position when the pink valves are slapped. Falling off the platform does damage, and above you will be fluttering pumpkins that will drop bricks on the valves. If the brick hits, you will be reoriented in the corresponding direction. This is very important to remember, because it will be a persistent problem throughout the fight.
The first big challenge is the giant cyclops specter leaning out of the train. His face has no eyes, but apparently his hands do, and he will bounce several dozen of them at you. They can be destroyed, and it’s easier to get them all when you’re as far away from him as possible. Jumping and shooting is a good way to cover as much of the screen and eliminate as much of the eyes as you can before they get to you.
Second Phase
Once the giant skeleton conductor bursts from the top of the train, this fight will get very dangerous. From two of the cars will emerge his hands, from the last, his face. These cars change every time, and the only targetable part of the conductor is his head. You’ll have to move your cart to wherever the head is to guarantee safety and gain a big damage opportunity. Otherwise, his giant hands are tough to escape.
That being said, there is a way to cheese this, at least a little. If you move your platform to the very far right, and sit on the left corner, you will be in prime position to avoid every attack he has. It can be tough to get a good angle on the head, and you’ll need to be very cautious of the pumpkin bats, but this strategy can work wonders during this phase.
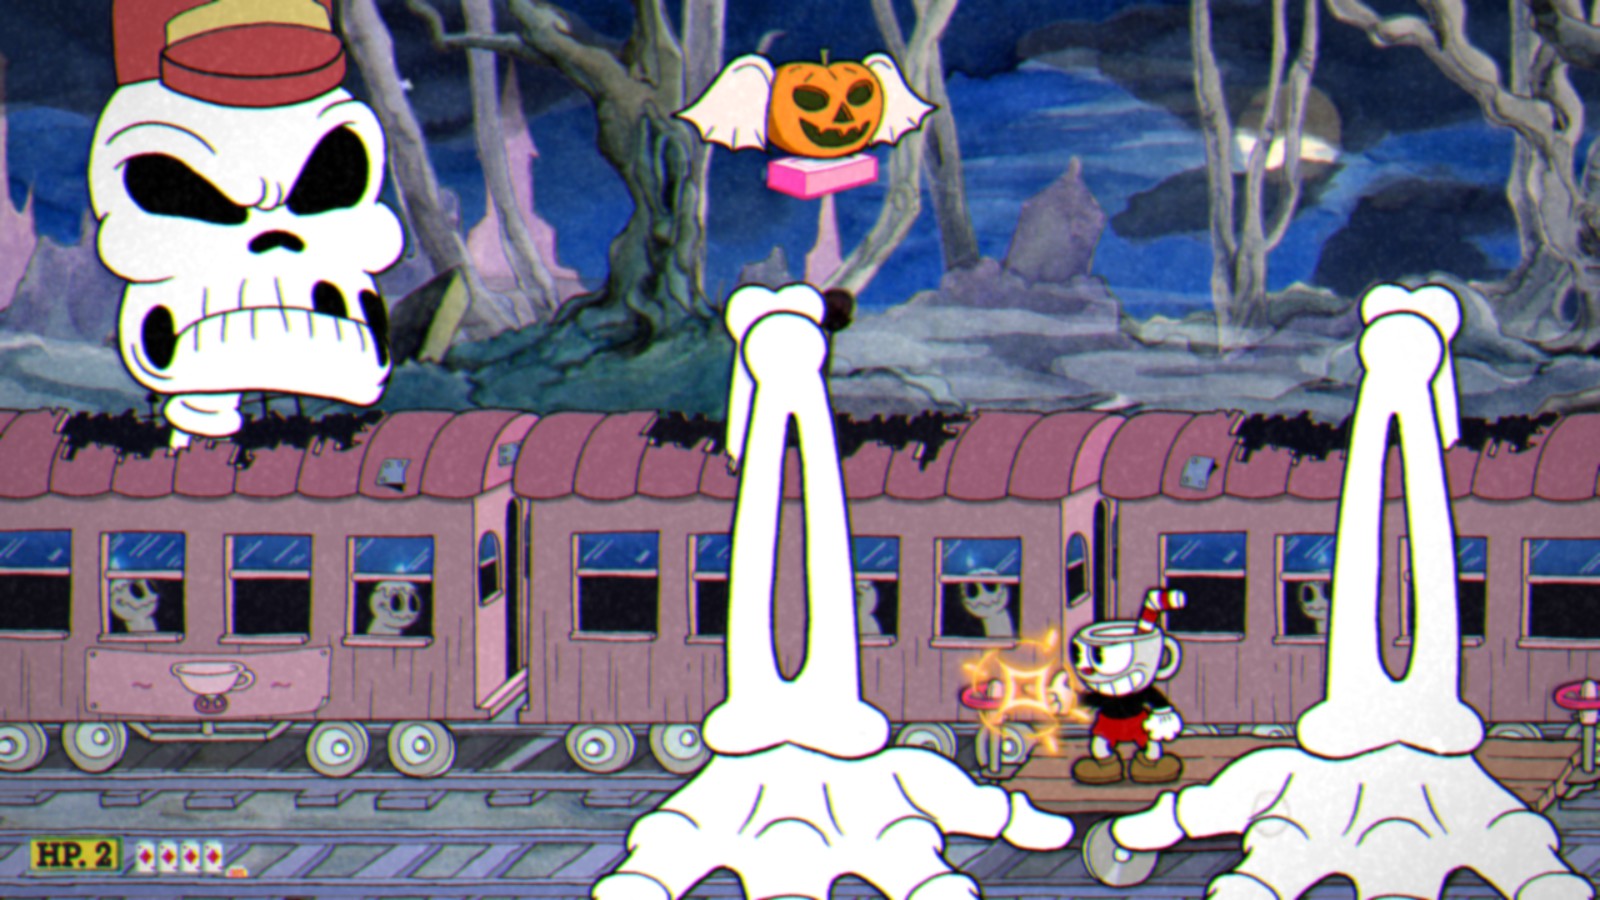
Third Phase
Two giant ,possessed RR sign-shaped demons burst from the top of the left and right cars. They have a lightning breath attack, where they sweep the area under them (and most of the screen) with lethal lightning. When you see one ready the attack, immediately move your cart the other way and stand as far back as possible. At the same time, shoot the sign your standing under until it dies. Acting quickly here will make the rest of this phase far easier. From your position at the far side, jump and shoot the other demon in the face, being wary of the ghosts being shot out of the smoke stacks in the middle. They will slowly follow you around, so you have to deal with them. Don’t shoot them when they are directly over the valves though, as they drop a pink skull that will activate them and move you against your will.
Fourth Phase
This may be the hardest, but most straightforward phase of this fight. The train engine will grow legs and begin to run on the tracks in the background. It’s lightbulb tail will glow pink, prompting you to slap it. When you do, the cover on its side opens, exposing its heart. It also exposes you to embers raining down on the stage, as well as a smoke boomerang that sweeps across quickly. You really have to maintain composure here, because a lot of things are gonna come at you at once and you’ll really need the focus. Shoot the heart every opportunity you get, and you’ll derail the Phantom Express.
When you’ve slain them all, head to the cave to meet King Dice and collect your freedom, one way or another! If you need more information, come to the Cuphead Wiki!